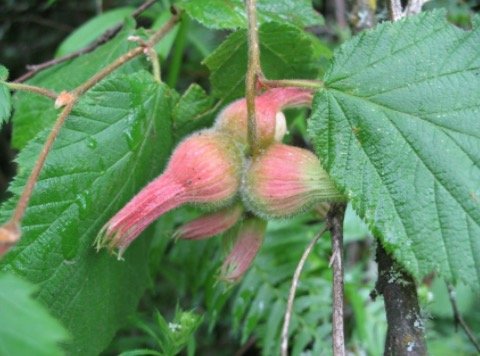
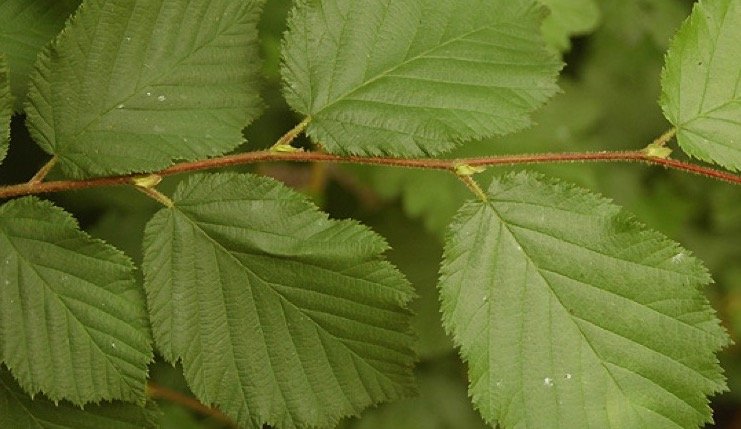
Corylus cornuta (beaked hazelnut) is a native shrub that grows wild in most of the United States and southern Canada. This small deciduous shrub grows in the forest understory and along forest margins.
In the fall, beaked hazelnuts produce acorn-like nuts that are high in protein and fat and provide food for a variety of animal species.
This upright underbrush shrub works well as a filler or background shrub in native landscapes. Gain knowledge of how to cultivate this nut-bearing, low-maintenance shrub.
The blooming period for these plants is usually spring, and the type of soil they require is well-drained, with a pH of 6.8 to 7.2. They can grow up to 12 inches tall. They require the sun completely.
How To Care Beaked Hazelnut?
The beaked hazelnut is a natural shrub that may be found all throughout North America, from southern Canada to California and Georgia. This medium-sized deciduous shrub belongs to the birch family (Betulaceae) and may thrive in a range of environments.
In a variety of light, soil, and moisture conditions, the beaked hazelnut thrives. It can also withstand high levels of pollution and thrives in urban areas. The male and female flowers of the beaked hazelnut grow on the very same plant, making it monoecious.
Female blossoms are tiny and inconspicuous, and male catkins are yellow. Flower induction in the spring. By the fall season, the beaked hazelnut yields fruit.
These nuts are edible to both people and animals, and they are liked by a variety of creatures, including birds, squirrels, chipmunks, rabbits, and foxes.
How To Grow Beaked Hazelnut?
i. Light
In both full sun and full shade, the beaked hazelnut thrives. High sun, on the other hand, will provide the finest flowers and the heaviest foliage.
ii. Soil
This versatile shrub can handle a broad range of soil conditions and isn’t fussy about the kind or pH of the soil. Nevertheless, well-drained soils are better for preventing waterlogging of the beaked hazelnut’s roots. The beaked hazelnut grows best on soils that are somewhat alkaline, with a pH of 6.8 to 7.2.
iii. Water
The drought-tolerant beaked hazelnut bush can adapt to both wet and dry growth environments. As a result, beaked hazelnut is an excellent option for xeriscaping or water-conserving landscaping.
iv. Temperature and Humidity
The beaked hazelnut is the most hardy of all the hazelnut species, surviving conditions as low as -50 degrees Celsius, which is -58 degrees Fahrenheit in the far north. It thrives in USDA zones 3 through 8.
v. Fertilizer
Fertilization is not required for flourishing beaked hazelnut bushes. Supplemental feeding is not required as long as the shrub produces blooms and fruit. A mild fertiliser may assist in promoting development if the shrub seems sick or is suffering from limited growth.
Varieties of Beaked Hazelnut
The beaked hazelnut comes in two variants. Geographical differences are a major factor in dividing these kinds.
1. The Eastern beaked hazel (Corylus cornuta var. cornuta) is a species of Corylus cornuta.
2. The Western beaked hazelnut (Corylus cornuta var. californica) is also known as the California hazelnut.
How To Grow Beaked Hazelnut From Seed?
Harvest the nuts from the shrub in the fall to start growing from seed. Seeds should be planted as soon as possible after harvesting since they necessitate 3 to 6 months of cold stratification.
Because sown beaked hazelnutseeds must be secured from rodents like squirrels and chipmunks, several gardeners choose to start beaked hazelnut seeds indoors to avoid being taken by hungry creatures.
To cultivate beaked hazelnut seeds indoors, immerse them in warm water for 48 hours after harvesting. To keep the water fresh, switch it every 24 hours. Eliminate any trash or particles that hover to the surface after breaking off.
Moisten a resealable plastic bag with enough sand to thoroughly cover the seeds. To cold-stratify the seeds, push the seeds into the sand until they are completely covered, then shut the bag and keep it in the refrigerator for three months.
Following 3 to 6 months of stratification, the seeds can be sprouted in a moistened soilless potting mix. Seeds should be planted an inch deep in the potting mix and placed in a warm spot, such as a sunny windowsill. If you have accessibility to a heat mat, you’ll get the best possible results.
Seedlings can indeed be moved into big pots filled with a well-drained potting mix after they reach a height of 10 inches. Once the tough winter weather has passed, transplant the developed seedlings outside.